Setting Up Your Website Using WordPress
In today’s digital age, having a website is essential for businesses, bloggers, and professionals alike. Whether you’re looking to share your thoughts, sell products, or offer services, a website can help you reach a wider audience. WordPress is one of the most popular platforms for creating websites due to its ease of use, flexibility, and powerful features. In this guide, we’ll walk you through the process of setting up your website using WordPress.
Why Choose WordPress?
Before diving into the setup process, it’s important to understand why WordPress is a preferred choice for many. Here are some key reasons:
- User-Friendly: WordPress is designed to be accessible for all users, regardless of their technical skills.
- Flexible and Customizable: With thousands of themes and plugins, you can create any type of website you need.
- SEO-Friendly: WordPress is built with search engine optimization in mind, helping your site rank better on search engines.
- Community Support: A vast community of developers and users ensures you have plenty of resources and support available.
Step 1: Choose a Domain Name and Hosting Provider
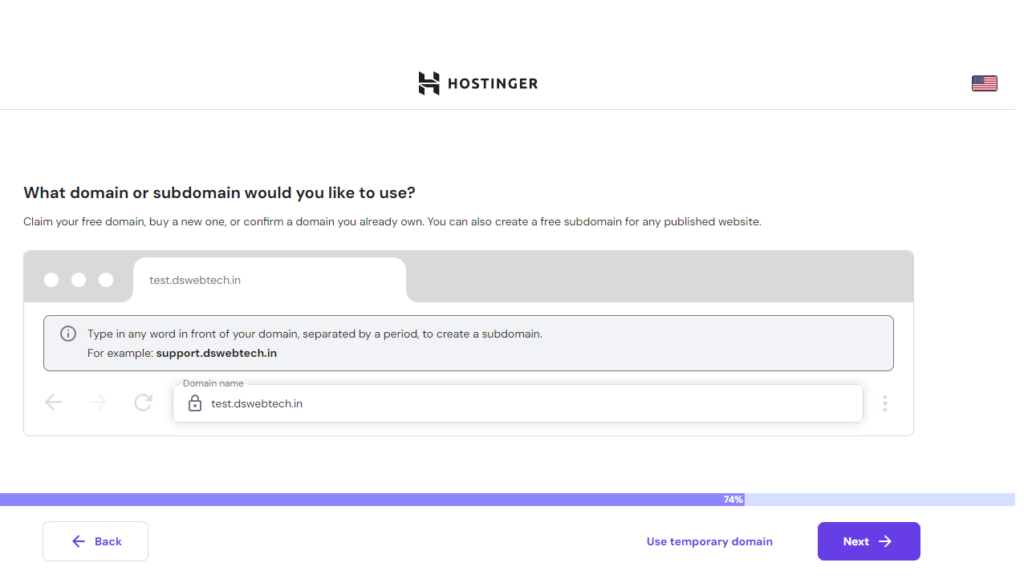
The first step in setting up your WordPress website is choosing a domain name and a hosting provider.
- Domain Name: This is your website’s address on the internet (e.g., www.yourwebsite.com). Choose a name that reflects your brand and is easy to remember.
- Hosting Provider: This is where your website’s files will be stored. There are many hosting providers to choose from, such as Hostinger, Bluehost, SiteGround, and HostGator. Look for providers that offer one-click WordPress installation.
Step 2: Install WordPress
Once you have your domain name and hosting provider, it’s time to install WordPress. Most hosting providers offer an easy, one-click installation process. Here’s how you can do it:
- Log In to Your Hosting Account: Use the credentials provided by your hosting service.
- Find the WordPress Installation Option: This is usually located in the control panel (cPanel).
- Run the Installation: Follow the on-screen instructions to install WordPress. You’ll need to choose your domain name, create an admin username, and set a password.
Install WordPress Manually
Installing WordPress Manually on Your Hosting Provider
Setting up a WordPress website manually can give you a better understanding of how your website works and allows for greater customization. While many hosting providers offer one-click installations, doing it manually can be beneficial for troubleshooting and learning purposes. Follow these steps to install WordPress manually on your hosting provider.
Prerequisites
Before starting, ensure you have the following:
- A Domain Name: This is your website’s address (e.g., www.yourwebsite.com).
- A Web Hosting Account: Choose a hosting provider that meets your needs.
- FTP Client: Software like FileZilla for transferring files from your computer to your server.
- A Text Editor: Such as Notepad++ or Sublime Text for editing configuration files.
Step 1: Download WordPress
- Visit the WordPress.org website: Go to WordPress.org and download the latest version of WordPress.
- Unzip the File: Extract the downloaded WordPress zip file to a folder on your computer.
Step 2: Upload WordPress Files to Your Hosting Server
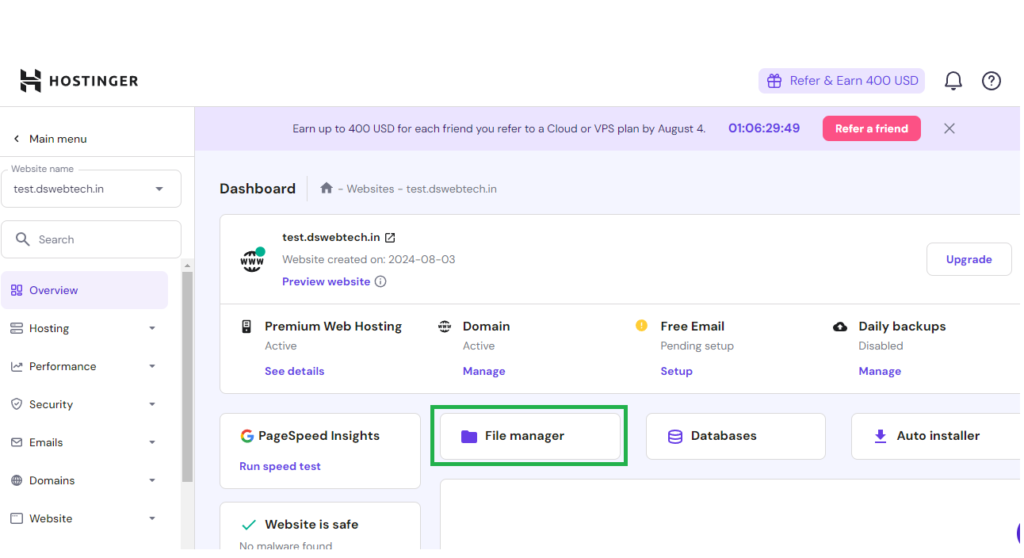
- Access Your Hosting Account: Log in to your hosting account’s control panel (cPanel).
- Open Your FTP Client: Use an FTP client like FileZilla.
- Connect to Your Server: Enter your FTP credentials (provided by your hosting provider) to connect to your server.
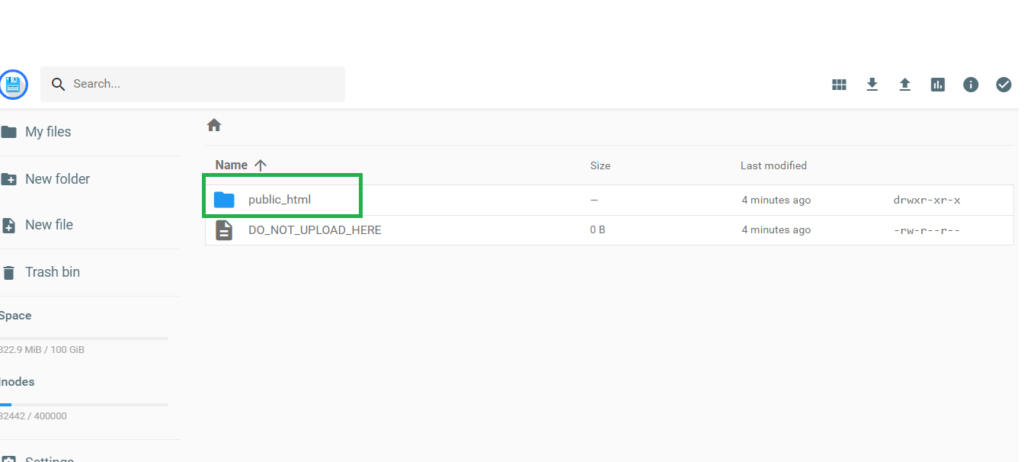
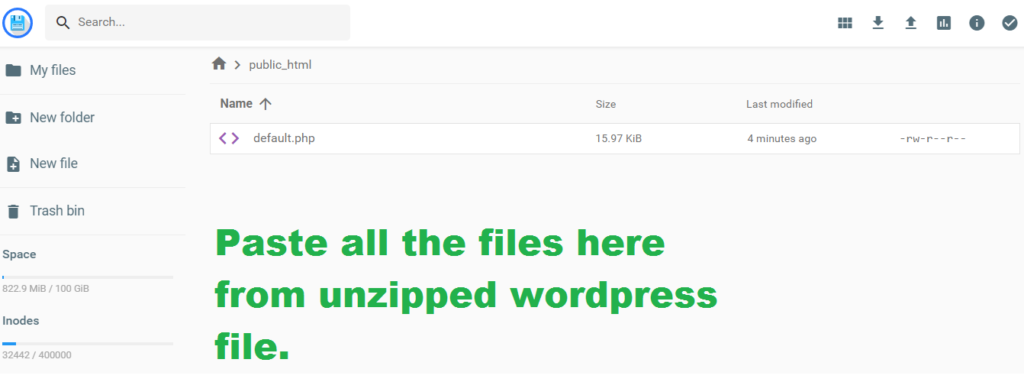
- Upload Files: Navigate to the root directory of your website (often public_html or www) and upload the extracted WordPress files from your computer to this directory.


Step 3: Create a MySQL Database
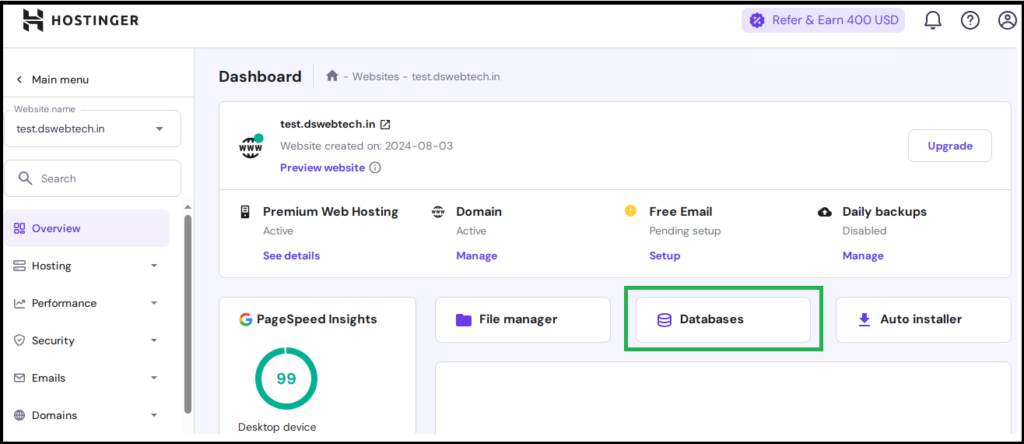
- Access the cPanel: Log in to your hosting control panel.
- Find the MySQL Database Section: Look for the MySQL Databases option.

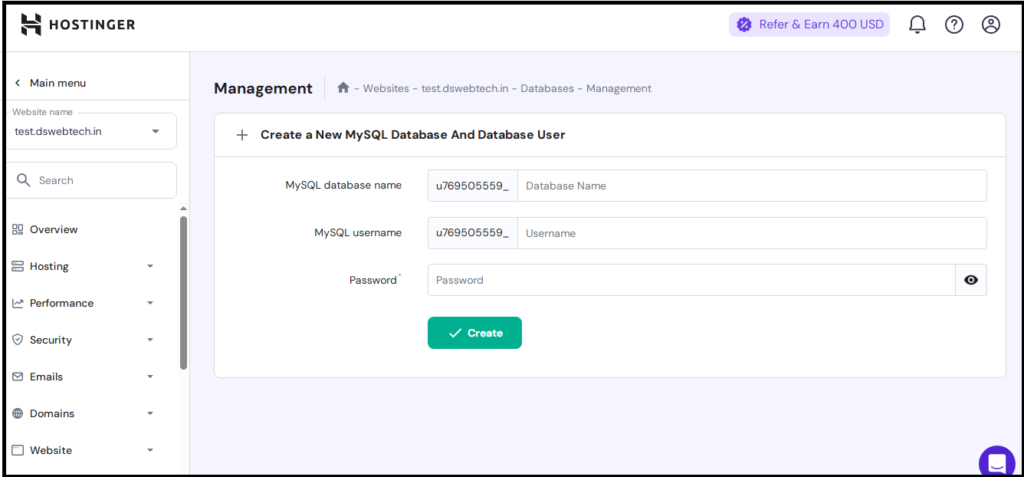
- Create a New Database: Enter a name for your database and click Create Database.

- Create a Database User: Create a new user with a username and password.
- Assign the User to the Database: Add the user to the database and assign all privileges to the user.
Step 4: Configure the wp-config.php File
- Locate the wp-config-sample.php File: In the WordPress files you uploaded, find wp-config-sample.php.
- Rename the File: Rename wp-config-sample.php to wp-config.php.
- Edit the File: Open wp-config.php with your text editor and enter your database details:

- Save the File: Save your changes and close the text editor.
Step 5: Run the WordPress Installation Script
- Open Your Web Browser: Go to your domain (e.g., www.yourwebsite.com).
- Run the Installation Script: You should see the WordPress installation screen. Click “Let’s go!” to start the installation.
- Enter Site Information: Fill in the required information, such as your site title, username, password, and email address.
- Complete the Installation: Click Install WordPress.
Step 6: Log In to Your WordPress Dashboard
- Go to the Admin URL: After the installation is complete, go to www.yourwebsite.com/wp-admin.
- Log In: Enter the username and password you created during the installation.
- Access the Dashboard: You will now see the WordPress dashboard, where you can start customizing your site.
Additional Tips for Manual Installation
- Optimize Your Site for Speed: Use caching plugins like W3 Total Cache or WP Super Cache to improve site performance.

- Secure Your wp-config.php File: Add the following code to the .htaccess file in your root directory to prevent unauthorized access:
- Set Up Regular Backups: Use a plugin or your hosting provider’s tools to back up your site regularly.
- Install Security Plugins: Consider using security plugins like Wordfence or Sucuri to protect your site from threats.
Step 3: Configure Basic Settings
After installing WordPress, you’ll need to configure some basic settings to get your website up and running.
- Log In to Your WordPress Dashboard: Go to www.yourwebsite.com/wp-admin and log in using the admin credentials you created during installation.
- Set Your Site Title and Tagline: Go to Settings > General. Here you can set your site title and tagline, which will appear in the title bar of browsers and in search results.
- Choose Your Time Zone: Also under Settings > General, choose your time zone to ensure your posts and updates are timestamped correctly.
- Set Your Permalink Structure: Go to Settings > Permalinks and choose a permalink structure. The “Post name” option is recommended for most sites as it’s clean and SEO-friendly.
Step 4: Choose a Theme
A theme determines the design and layout of your WordPress website. WordPress offers thousands of free and premium themes to choose from.
- Go to Appearance > Themes: Here you can browse the available themes.
- Preview and Install a Theme: Click on a theme to see a preview. If you like it, click the Install button, then activate it.
Step 5: Install Essential Plugins
Plugins extend the functionality of your WordPress site. There are plugins for everything from SEO and security to social media and contact forms. Here are some essential plugins to get started:
- Yoast SEO: Helps optimize your site for search engines.
- Akismet: Protects your site from spam comments.
- Jetpack: Offers a suite of features including site stats, security, and social media integration.
- Contact Form 7: Allows you to easily add contact forms to your site.
To install plugins:
- Go to Plugins > Add New: Search for the plugin you want to install.
- Click Install Now: Then activate the plugin once it’s installed.
Step 6: Create Essential Pages
Now it’s time to create the essential pages your website needs. Common pages include:
- Home Page: The main landing page of your site. You can set this by going to Settings > Reading and choosing a static page for your homepage.
- About Page: Tell visitors who you are and what your site is about.
- Contact Page: Provide visitors with a way to get in touch with you. Use a contact form plugin to make this easy.
- Blog Page: If you plan to write blog posts, create a page to display them.
To create a page:
- Go to Pages > Add New: Enter the title and content for your page.
- Click Publish: To make the page live.
Step 7: Customize Your Site
With your theme installed and essential pages created, it’s time to customize your site to make it uniquely yours.
- Go to Appearance > Customize: This will open the WordPress Customizer where you can make changes to your site’s appearance.
- Header and Footer: Customize your site’s header and footer by adding logos, navigation menus, and widgets.
- Widgets: Add widgets to your sidebar or footer to display recent posts, categories, social media links, and more.
- Menus: Go to Appearance > Menus to create and manage your site’s navigation menus.
Step 8: Add Content
Content is the heart of your website. Start by adding a few posts and pages to get your site going.
- Create Posts: Go to Posts > Add New. Enter the title, content, and images for your post. Use categories and tags to organize your posts.
- Create Pages: Similar to creating posts, go to Pages > Add New and add content for your pages.
Step 9: Optimize for SEO
To ensure your site can be easily found by search engines, you’ll need to optimize it for SEO.
- Use an SEO Plugin: Install and configure an SEO plugin like Yoast SEO.
- Optimize Your Content: Use relevant keywords in your titles, headings, and content. Write meta descriptions for your posts and pages.
- Create a Sitemap: A sitemap helps search engines index your site. Your SEO plugin can help create one.
Step 10: Launch Your Site
Once you’re happy with your site’s content and design, it’s time to launch!
- Go Live: Make sure all your pages are published and your site is ready for visitors.
- Promote Your Site: Share your site on social media, submit it to search engines, and start building backlinks to improve your SEO.
Maintaining Your WordPress Site
Setting up your website is just the beginning. Regular maintenance is crucial to keep your site running smoothly and securely.
- Update WordPress, Themes, and Plugins: Regularly check for updates and install them to keep your site secure and up-to-date.
- Backup Your Site: Use a backup plugin to regularly backup your site’s data.
- Monitor Site Performance: Use tools like Google Analytics to monitor your site’s performance and make improvements as needed.
Conclusion
Setting up a website using WordPress is a straightforward process, even for beginners. By following these steps, you can create a professional and functional website that meets your needs. Remember, the key to a successful website is not just in the setup but also in regular maintenance and content updates. With WordPress, you have all the tools you need to build and grow your online presence. Happy website building!
And to Learn About Your Website Speed Optimization Click Here!


